• Home
  • About Us
    • Our Mission and Vision
    • The Youth Workin’ It Team
      • Shae Pepper, Managing Director
      • Stephen Pepper, Operations Director
    • Recommendations for the Youth Workin’ It Team
  • Youth Work Resources
    • How To Plan A Youth Retreat Book
    • 52 Scavenger Hunt Ideas
  • Contact Us

Youth Workin' It

Consultancy and Resources for Youth Workers and Organizations Worldwide

  • Youth Group Games
  • Session Plans
  • Fundraisers
  • Youth Retreats
  • Life Skills
  • Interview Skills
  • Scavenger Hunts
  • Would You Rather Questions
  • Program Administration
  • Policies & Procedures
  • Youth Participation
  • Group Agreement

Social Media Dashboards In Youth Work

October 11, 2011 By Shae Pepper Leave a Comment

Social media dashboards youth workQ: I’ve set up my Facebook and Twitter profiles for my youth work, but how can I keep up with them all?

Maybe you have a personal Facebook profile, personal Twitter handle, professional LinkedIn profile, not to mention your youth work Facebook profile and page and Twitter profile…

It can be exhausting signing in and out to each social media site, sending updates, finding time to keep up with everything that’s going on within them, it goes on and on.

Thankfully, there are social media dashboards which, just like the dashboard on your car, allows you to see everything important that’s going on all in one place.  You download the program, link to your various social media accounts and go to one place to send and receive updates.

There are 2 reasons why I use a social media dashboard:

  1. To see all my social media profiles in one place for ease of access – I have access to 2 Twitter accounts, 2 Facebook accounts and my LinkedIn profile all in one place.
  2. To schedule my updates when I am unable to be online – I can schedule updates including links throughout the day or days in advance, plus it allows for some downtime when producing 6 days of content a week.

Here’s an article that suggests the top 10 social media dashboards. Two sites that turn up on that list – Tweetdeck and Hootsuite – are ones I tried when starting this site. In my opinion both have their advantages. You can read more about their advantages and disadvantages here.

Based on the 2 reasons I was using social media dashboards for, I started out using Tweetdeck but then switched to basic Hootsuite because it met my needs better. I switched for 3 reasons:

  1. Access to profiles: Tweetdeck is very comprehensive but to view all my social media profiles I had to scroll left and right and wait for it to update. On Hootsuite, each profile is its own tab so you can switch between profiles very quickly and easily.
  2. Scheduling updates: Tweetdeck does have a scheduling profile but it was not very user-friendly. When I switched, you were unable to type in your time and date in, although they have since updated this feature. You also need to shorten your links, then copy and paste them into Tweetdeck updates. Hootsuite has a time selection tool for scheduling updates and a built-in feature for shortening your links.
  3. General Use and Aesthetics: Tweetdeck is black, with yellow font and has a pop-up for every tweet you receive. This was distracting as I tried to work on other things on my desktop, even when I turned off the sound.  Hootsuite allows you to choose between a white and blue (lighter, but similar to Facebook) and white and light green. It automatically updates every 2 minutes, but you can click the manual refresh button at any time. Overall, I found Hootsuite more intuitive to set up, easier to use and easier on the eyes (plus, I’ll be honest, I’m a sucker for a cute owl logo)
Tweetdeck, Hootsuite and other social media dashboards have their advantages and disadvantages. The best thing I can suggest is that you try different ones until you find the one that best suits your needs.

Question: If you already use a social media dashboard, which one do you use and why? Let us know in the comments below.

You can also connect with us by:

  1. Signing up to receive our posts via email
  2. Following us on Twitter
  3. Liking us on Facebook
  4. Signing up to our RSS feed


Jesus, Youth and Twitter

October 8, 2011 By Shae Pepper Leave a Comment

This picture came through my Facebook account this week from various sources. Enjoy!

Jesus, youth and Twitter

How To Set Up Facebook Groups And Events For Your Youth Group

October 4, 2011 By Shae Pepper Leave a Comment

Facebook groups and events for youth groupQ: How do I set up Facebook group and events for my youth group?
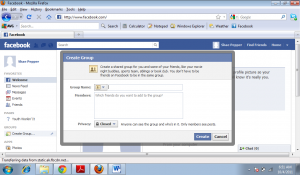
You now have a Facebook Profile and maybe even a Facebook Page. Maybe you decided a page wasn’t the right fit for your youth work. You want somewhere to interact with your youth and their friends who are part of your programs but you want better control over the privacy settings. A group is just what you’re looking for!

A Facebook group allows you to control who sees it, who joins it and you can easily create events for just those group members – perfect for youth work!

Below are step-by-step guides to creating Facebook groups and then for creating an event. *Remember if you want to reach us use our contact page, not the gmail created and listed for these how-to examples.

How To Set Up Facebook Groups in 5 Easy Steps:

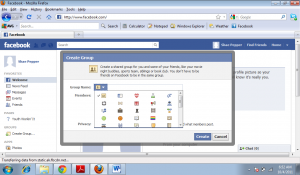
1. In the left hand tool bar of your profile, click ‘Create Group’

2. You’ll need to choose a group name and add Facebook friends to the group.

3. You can choose a fun ‘favicon’ for your group (a little picture that will show up next to your group name – in my example I chose a megaphone)

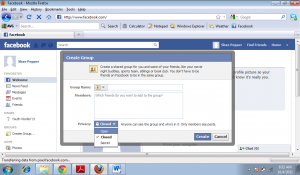
4. Choose whether you want your group to be open, closed or secret. Open groups are visible to the public, including who the members are and what their posts are (this is probably not a good choice for most youth groups to maintain confidentiality in your group) and anyone can join the group.

A closed group means that the group name and members can be seen but only group members can view the posts within the group – those wanting to join the group have to ask to join.

A secret group means that the group itself is not visible to the public, nor are its members or posts – youth in your group would need to invite or add their friends to this group – they couldn’t just find it because it doesn’t appear to any non-members.

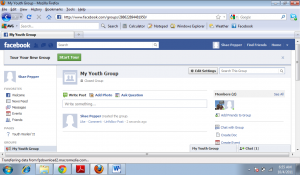
5.  Create your group. Once all the info is entered, click ‘create’ and you now have a Facebook group! At the top you’ll see a button that says ‘Take the Tour’ – click this for a quick and useful tutorial on the features of your new group.

This was just the basic info you need to start a group. For more detailed information on Facebook Groups, check out their help section.

Events can be created from your Facebook profile or from groups. I decided to include these together in the same post so that you can easily create events just for your youth program members and not your wider Facebook friends.

How to create Facebook Events in 3 easy steps:

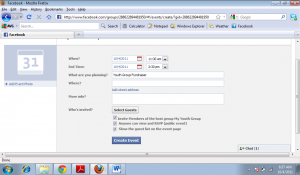
1. Click ‘create event’ in the right hand tool bar of your group. When you do, you’ll the page below. Input your information. One neat feature is that if you’re having a car wash fundraiser at the gas station down the street from your location, you can type in ‘gas station’ and it’ll bring up local gas stations (if you have the location feature allowed on Facebook) and you just click on the correct one – otherwise just put in the address.

You can also choose how group members can RSVP and whether they can invite friends to join the event with the tick boxes at the bottom. When all your information is complete, click ‘create event’.

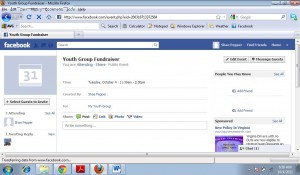
2. Yup. It’s just that easy. You now have an event for your group members. This is a great way to schedule youth retreats, lock-ins, fundraisers, trips, etc. with the youth in your programs and their parents. You can still edit info about this event by clicking ‘edit event’ in the upper right hand corner.

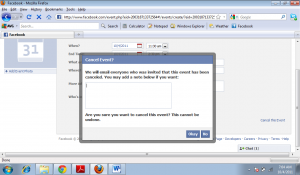
3. If something happens and you need to cancel you’re event- click ‘edit event’ and at the bottom choose ‘cancel event’ A screen will pop up that gives you the option to send your event invitees a message. When you click ‘Okay’, that will cancel your event.

For any extra help with Facebook Events check out their FAQ’s and Help.

Question: How do you use Facebook groups and events in your youth work? Share your ideas in the comments below.

You can also connect with us by:

  1. Signing up to receive our posts via email
  2. Following us on Twitter
  3. Liking us on Facebook
  4. Signing up to our RSS feed


How To Create A Facebook Page – Youth Work Q & A

September 27, 2011 By Shae Pepper 8 Comments

Youth group Facebook page
Not quite what we meant by Facebook

Q: How do I create a page for my youth group, youth retreat, youth work program or youth organization?

A: Now that you have a Facebook account, it’s time to set up your Facebook page.

A page differs from a profile in one major way:

The page is public by default. Profiles have privacy settings that keep your information private from the public. Pages are designed for businesses, organizations and famous people to have a space on Facebook so that people can receive their updates, offers, etc. All you do to receive the updates from a page is ‘Like’ it and that makes you a fan. The page’s updates will show up in your news feed.

Due to the public nature of the page, you may want to consider creating a Facebook group for your youth group.

How to create a Facebook page

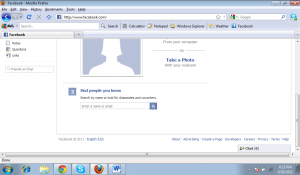
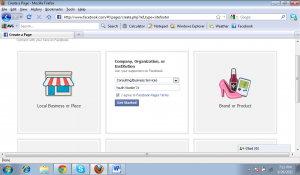
1. At the bottom of your Facebook home page there is a small link that says ‘create a page’; click that link.

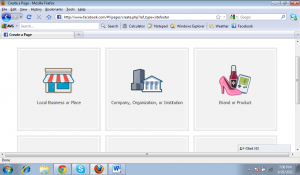
2. You will then be prompted to choose what kind of page you’ll be setting up. A local business or place; Company, organization or institution; Brand or product; Artist, band or public figure; Entertainment; Cause or Community

3. Complete the necessary information for your page. You can select from a drop down list to ensure you create just the right page for your needs. For this example I’ve chosen ‘Company, Organization or Institution’ and from the drop down list ‘Consulting/ Business Services’

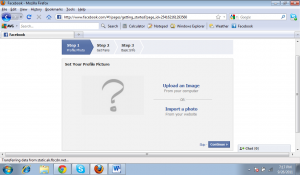
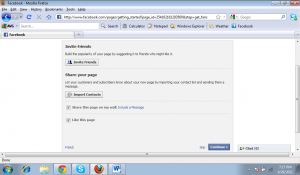
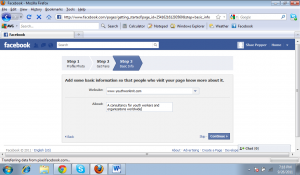
4. Go through the steps and upload your photo, import your friends from your email and add info about your organization. You can click ‘skip’ if you would like to come back to each step later.

5.  You now have your page! Congratulations!

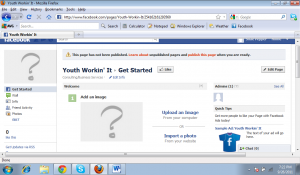
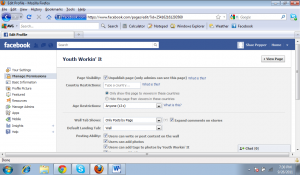
6. Your page is now public. You can make it ‘unpublished’ until you’ve added all the information to it you want. Click on the top right button that says ‘edit page’. When you click that, the very first option is to unpublish your page. This is a good option while you get your page just right. Don’t forget to click ‘save changes’!


Take some time to look at the other options in the left hand tool bar to make further edits to your page. You might also find Facebook’s help section useful.

Remember:  You don’t get a unique user name for your page until you have 25 ‘likes’. Then you can choose to be www.facebook.com/yourpagenamehere.

Not sure if social media is right for you?  Check out our post about how you can use social media to work with your youth.

Question: How do you use Facebook pages for your youth work? Share your experiences in the comments below.

You can also connect with us by:

  1. Signing up to receive our posts via email
  2. Following us on Twitter
  3. Liking us on Facebook
  4. Signing up to our RSS feed


How To Set Up A Facebook Or Twitter Account (Step by Step)

September 20, 2011 By Shae Pepper 12 Comments

Q: How do I set up a Facebook or Twitter account? How to set up a Facebook and Twitter account

Previously, we explored why you might want to use social media to engage with the young people in your youth group or programs. Over the next few weeks, we’ll provide some ‘how-to’s’ for setting up and managing social media accounts for your programs.

It may seem basic to those tech-savvy youth workers out there, but there are still many youth workers who might not be using these social media tools to reach their youth, so lets start at the beginning. I would also like to preface this post with the information that I am a die-hard Chrome fan and the use of Firefox is simply for screen shots.

Already use Facebook and Twitter? You might want to check out Youth Leader Academy’s series on social media in youth ministry.

Facebook

Glossary of Facebook Terms:

Profile – this is your information and ‘personal’ page on Facebook.  Maybe you already have a personal profile and you want to do it as a work profile. If that’s the case, just keep the information and photos professional and work related.  You can view your profile anytime by clicking on your name in the left column.

Page – these are often set up by organizations, businesses or – in your case – youth workers, who want people to come to that page on Facebook for information about their service and events. There is a ‘like’ button on it that helps you reach those that want to know more about your programs. Check out this post for how to set up a Facebook page for your youth group.

Groups – these can be set up by anyone and you can make one (or more) from your profile. Maybe you want a group for Sr. High Youth and Jr. High Youth, etc. You would create a group and invite the youth in your group on Facebook to join so they can get all the updates; they can invite others to the group as well. See our post on how to set up a Facebook group for your youth group for further details.

Events –you can create events including all your information and a wall for young people or youth workers to interact on leading up to the event, they can RSVP and invite others! Check out how to set up a Facebook event for your youth group for a guide on how to do this.

Status – this is how you update all of your friends about what you are doing or thinking at any moment.

Wall – this is the place where people can post links, photos or comments to you on your profile

News Feed – it gives you all the information about all of your friends (or the ones you most interact with) and can be accessed by clicking on the Facebook logo in the top left corner.

Tag – you can identify people who are using Facebook in pictures, in status updates, in comments, etc.  You do this by typing the @ symbol and their name all as one word (this works for pages too) and then choose them from the drop down list that will appear.

Messaging – you can send private messages to one or more people by using the inbox and messaging system- its like email built into Facebook.

Update since Posting:  Subscribe – This is a button that you press to allow subscribers to your public posts. We will talk about privacy functions later but for now, trust that if your privacy settings are ‘friends only’ the public can’t see your updates unless you make an update public.

Setting up a Facebook account:

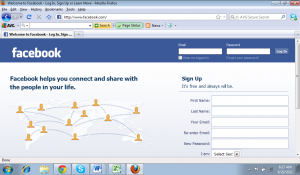
1. Go to www.facebook.com

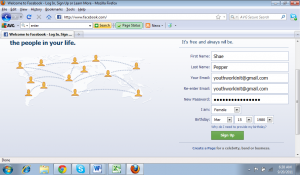
2. On the right hand side of the page you will see an area to sign up. Fill in your information. If this is purely for work use, maybe use your work email or create a new email address for the account. REMEMBER: Users on Facebook must be 13
3. When you click ‘sign up’, you will be prompted to type words exactly as they are seen in the box – this is make sure you are a real person trying to set up an account.

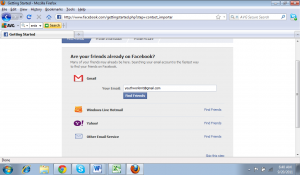
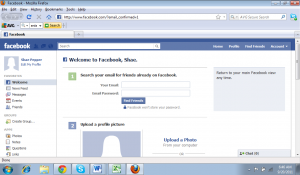
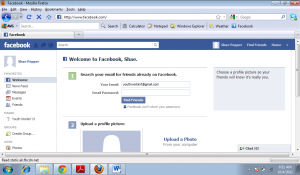
4. You will be taken to the set-up page – you will be prompted on the first page to search your email address to find friends already on Facebook. You can also click ‘skip this step’ at the bottom right of the screen if you don’t wish to do that.

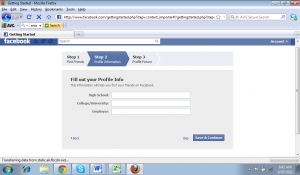
5. The second step of the set up is putting in some of your information. Again if this is purely for work only put in information that is relevant to the work you are doing. Keep some privacy between you and your youth by keeping the information about you very surface on your Facebook page. The youth in your program may invite other friends, who you do not know, to check out the things going on in your programs based on this page, so keep good boundaries from the start.

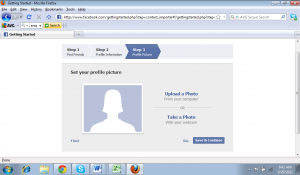
6. The third step in setting up your account is to upload a picture of yourself or to take one using your webcam.

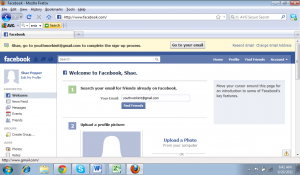
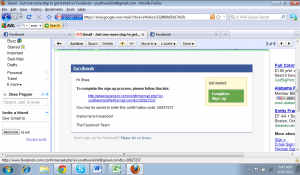
7. At some point in this process you will be prompted to go back to your email and confirm your account. (See top of image) Click on ‘go to your email’

8. In your email account, you will have received an email from Facebook that looks similar to this. Click on the link to confirm your account.

9. Once you click it, you will either be brought back to log in to your account or you will be brought to your Profile page. It won’t look just like everyone else’s profile on Facebook yet since you haven’t put in a bunch of information.


Congratulations! You now have a Facebook account. You can log in to it by using the log in area at the top right hand of the Facebook.com page (See Facebook  image 1). Check out our post on how to create a Facebook page for your youth group.


Twitter

Glossary of Twitter Terms:

Tweets – These are updates that are 140 characters or less that you can also add a link to

RT – The re-tweet, you can send someone else’s tweet to all the followers on your timeline by clicking the ‘re-tweet’ button. If you click ‘reply’, it only goes to the person who sent the original tweet and possibly their followers (if they follow you as well). You can include ‘RT’ at the start of your tweet to indicate that it is a re-tweet from someone else.

Timeline – This is similar to the News Feed on Facebook. You get updates from the organizations and people you are following on Twitter.

Followers – These are the organizations and people on Twitter who get your updates in their Timeline.

Following – You will also want to ‘follow’ others and as you click ‘follow’ on their Twitter profiles, you will get their updates in your timeline.

Trending – What is being talked about the most which is identified by the use of the #tag (hash tag)

Hash Tags – These help everyone to know what is trending on Twitter and/or so you can find people talking about things you’re interested in. It has a # sign in front of it (number or pound sign in the US but Hash in the UK – hence the ‘hash tag’). Popular hash tags for youth workers include #youth #youthwork #youthworker #ywchat #youthministry #stumin (student ministry- took me a minute on that one I’ll be honest!)  and #cathym (catholic youth ministry) When you click on those links in Twitter, it will bring up everyone else who has used that hash tag and what they were talking about.

DM – Direct messaging is where you can send a 140 character message privately to another Twitter member

Setting up a Twitter account:

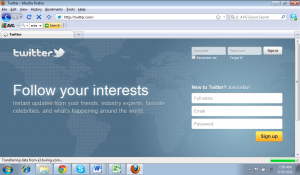
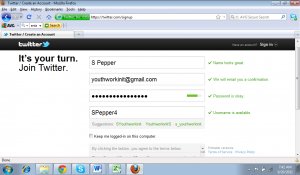
1. Go to www.twitter.com

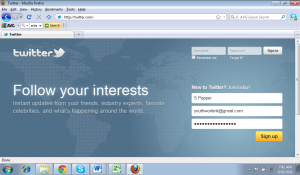
2. Enter your information into the ‘New to Twitter’ area

3. You will check your information and choose an available username. Once you’re happy with it all click ‘Create my Account’ at the bottom.

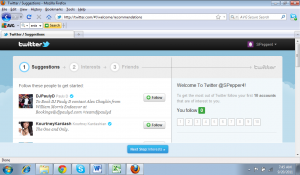
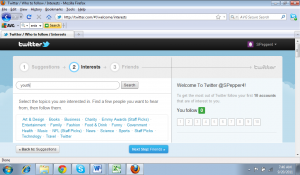
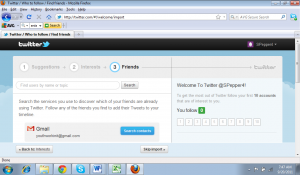
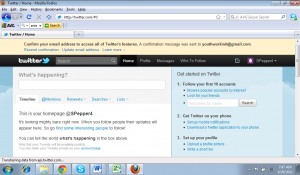
4.  Similar to Facebook, Twitter walks you through the set up process for a basic profile. Step 1 is suggestions. Step 2 is interests (I’ve typed in ‘youth’ to the search line). Step 3 is email import of friends and contacts using Twitter, but you can select ‘skip import.’

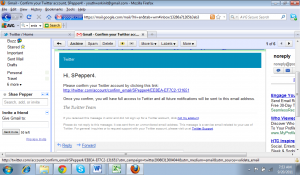
5.  Twitter also requires email confirmation. See top of image.

6. Click on the link in your email.

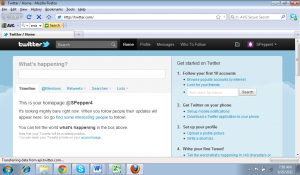
7.  It redirects you back to your Twitter profile. Check out the toolbar down the right hand side to upload photos, personalize your information and start tweeting!

Congratulations! You now have a Twitter profile and you can start sharing interacting with the youth and youth workers on Twitter 140 characters at a time. You can log in to Twitter anytime by using your username and password in the top right hand corner (see Twitter image 1 above) of the Twitter.com page.

Update since posting:  You can find our other posts on Youth Work and Social Media here.

Question: How do you (or how do you plan to) use Twitter and Facebook to improve your youth work, youth groups or youth programming? Let us know in the comments below.

You can also connect with us by:

  1. Signing up to receive our posts via email
  2. Following us on Twitter
  3. Liking us on Facebook
  4. Signing up to our RSS feed


« Previous Page
Next Page »

501 Would You Rather Questions

501 Would You Rather Questions

52 Scavenger Hunt Ideas

52 Scavenger Hunt Ideas cover

How To Plan A Youth Retreat

How To Plan A Youth Retreat cover

Categories

Best Of Youth Workin' It
Book Reviews
Guest Post
Spotlight on Youth
Types Of Youth Work
Would You Rather Questions
Youth & Society
Youth Group Activities
Youth Group Fundraiser
Youth Group Games
Youth Retreat
Youth Work Program Administration
Youth Work Q & A
Youth Work Session Plan Ideas
Youth Worker Stuff
Youth Workin' It Stuff

Tags

Administration Balloons Boundaries Budget Christmas Communication Facebook Food Food Games Global Issues Global Youth Work Goal Setting Group Development Group Games Guest Posts Interview Skills Life Skills Parents Planning Policies and Procedures Relationships Relay Games For Teenagers Scavenger Hunt Ideas School Self-Esteem SMART Social Media Strategic Planning Team Building Twitter Up Front Games Volunteering Volunteers Water Games For Youth Would You Rather Youth Behavior Youth Cartel Youth Group Bonding Youth Participation Youth Retreat Center Youth Retreat Themes Youth Scavenger Hunt Youth Work Definition Youth Work Resources Youth Work Training

Search Youth Workin’ It

All Content © Copyright 2011-2025, Stephen & Shae Pepper, youthworkinit.com