Originally Posted on September 20, 2011
Q: How do I set up a Facebook or Twitter account? 
A: Previously we explored why you might want to use social media to engage with the young people in your youth group or programs. Over the next few weeks we will provide some ‘how-to’s’ for setting up and managing social media accounts for your programs.
It may seem basic to those tech-savvy youth workers out there, but there are still many youth workers who might not be using these social media tools to reach their youth, so lets start at the beginning. I would also like to preface this post with the information that I am a die-hard Chrome fan and the use of Firefox is simply for screen shots.
Already use Facebook and Twitter? You might want to check out Youth Leader Academy’s series on social media in youth ministry.
Glossary of Facebook Terms:
Profile- this is your information and ‘personal’ page on Facebook. Maybe you already have a personal profile and you want to do it as a work profile, if that’s the case, just keep the information and photos professional and work related. You can view your profile anytime by clicking on your name in the left column.
Page- these are often set up by organizations, businesses or in your case youth workers, who want people to come to that page on Facebook for information about their service and events. There is a ‘like’ button on it that helps you reach those that want to know more about your programs. More on how to set this up soon.
Groups- these can be set up by anyone and you can make one (or more) from your profile. Maybe you want a group for Sr. High Youth and Jr. High Youth, etc. You would create a group and invite the youth in your group on Facebook to join so they can get all the updates. They can invite others to the group as well.
Events- you can create events including all your information and a wall for young people or youth workers to interact on leading up to the event, they can RSVP and invite others!
Status- this is how you update all of your friends about what you are doing or thinking at any moment.
Wall- this is the place where people can post links, photos or comments to you on your profile
News Feed- it gives you all the information about all of your friends (or the ones you most interact with) and can be accessed by clicking on the Facebook logo in the top left corner.
Tag- you can identify people who are using Facebook in pictures, in status updates, in comments, etc. You do this by typing the @ symbol and their name all as one word (this works for pages too) and then choose them from the drop down list that will appear.
Messaging- you can send private messages to one or more people by using the inbox and messaging system- its like email built into Facebook.
Update since Posting: Subscribe- This is a button that you press to allow subscribers to your public posts. We will talk about privacy functions later but for now, trust that if your privacy settings are ‘friends only’ the public can’t see your updates unless you make an update public.
Setting up a Facebook account:
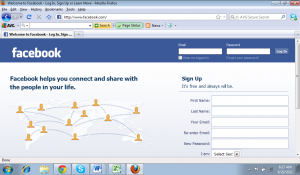
1. Go to www.facebook.com
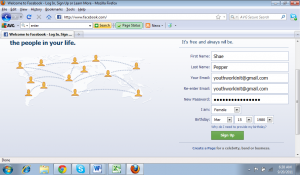
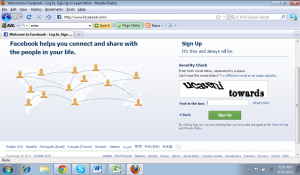
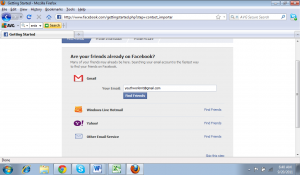
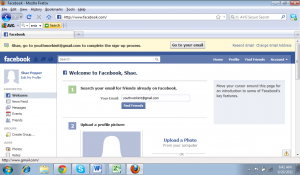
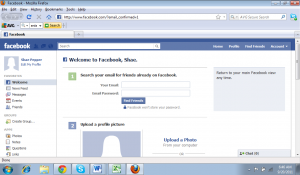
4. You will be taken to the set-up page- you will be prompted on the first page to search your email address to find friends already on Facebook. You can also click ‘skip this step’ at the bottom right of the screen if you do not wish to do that.
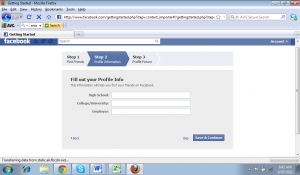
5. The second step of the set up is putting in some of your information. Again if this is purely for work only put in information that is relevant to the work you are doing. Keep some privacy between you and your youth by keeping the information about you very surface on your Facebook page. The youth in your program may invite other friends, who you do not know, to check out the things going on in your programs based on this page so keep good boundaries from the start.
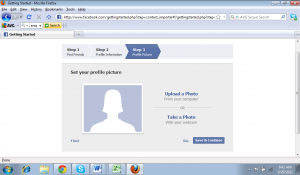
6. The third step in setting up your account is to upload a picture of yourself or to take one using your webcam.
7. At some point in this process you will be prompted to go back to your email and confirm your account. (See top of image) Click on ‘go to your email’
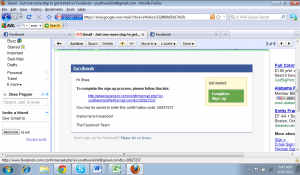
8. In your email account you will have gotten an email from Facebook that looks similar to this. Click on the link to confirm your account.
9. Once you click it, you will either be brought back to log in to your account or you will be brought to your Profile page. It won’t look just like everyone else’s profile on Facebook yet since you haven’t put in a bunch of information.
Congratulations! You now have a Facebook account. You can log in to it by using the log in area at the right hand top of the Facebook.com page (See Facebook image 1). If you have a youth group you want to have a Facebook page for then check back soon because we’ll be covering that and so much more!
Glossary of Twitter Terms:
Tweets- These are updates that are 140 characters or less that you can also add a link to
RT- The re-tweet, you can send someone else’s tweet to all the followers on your timeline by clicking the ‘re-tweet’ button. If you click ‘reply’ it only goes to the person who sent the original tweet and possibly their followers. You can include ‘RT’ at the start of your tweet to indicate that it is a re-tweet from someone else.
Timeline- This is similar to the News Feed on Facebook. You get updates from the organizations and people you are following on Twitter.
Followers- These are the organizations and people on Twitter who get your updates in their Timeline.
Following- You will also want to ‘follow’ others and as you click ‘follow’ on their Twitter profiles you will get their updates in your timeline.
Trending- What is being talked about the most which is identified by the use of the #tag (hash tag)
Hash Tags- These help everyone to know what is trending on Twitter and/or so you can find people talking about things you’re interested in. It has a # sign in front of it (number or pound sign in the US but Hash in the UK- hence the ‘hash tag’) Popular hash tags for youth workers include #youth #youthwork #youthworker #youthministry #stumin (student ministry- took me a minute on that one I’ll be honest!) and #cathym (catholic youth ministry) When you click on those links in Twitter it will bring up everyone else who has used that hash tag and what they were talking about.
DM- Direct messaging is where you can send a 140 character message privately to another Twitter member
Setting up a Twitter account:
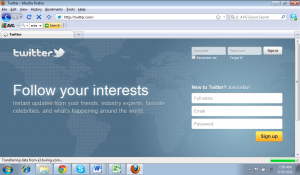
1. Go to www.twitter.com
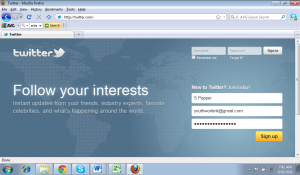
2. Enter your information into the New to Twitter area
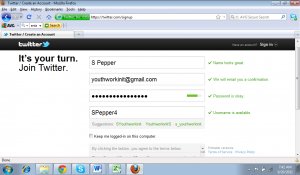
3. You will check your information and choose an available username. Once you’re happy with it all click ‘Create my Account’ at the bottom.
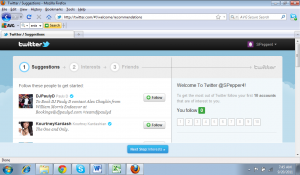
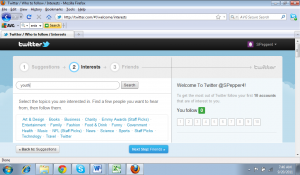
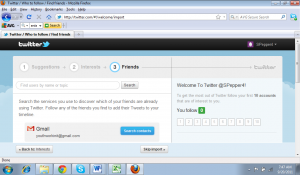
4. Like Facebook, Twitter walks you through the set up process for a basic profile. Step 1 is suggestions. Step 2 is interests (I’ve typed in ‘youth’ to the search line). Step 3 is email import of friends and contacts using Twitter, but you can select ‘skip import.’
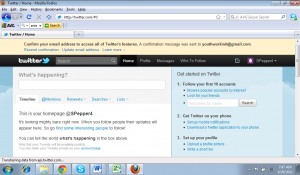
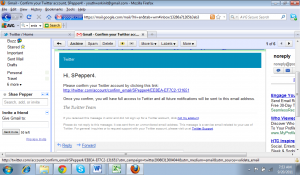
5. Twitter also requires email confirmation. See top of image.
6. Click on the link in your email.
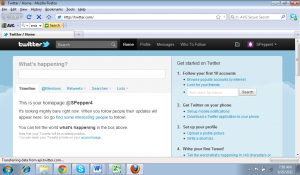
7. It redirects you back to your Twitter profile. Check out the toolbar down the right hand side to upload photos, personalize your information and start tweeting!
Congratulations! You now have a Twitter profile and you can start sharing interacting with the youth and youth workers on Twitter 140 characters at a time. You can log in to Twitter anytime by using your username and password in the top right hand corner (see Twitter image 1 above) of the Twitter.com page.
Update since posting: You can find our other posts on Youth Work and Social Media here.
You can connect with us by:
- Signing up to receive our posts via email
- Following us on Twitter
- Liking us on Facebook
- Signing up to our RSS feed
